A Step-by-Step Guide to Installing a New Head Unit
How to swap out a car radio head unit with a new one?
A new head unit may update your dashboard, increase the performance of your speaker system, and provide access to a variety of media devices, including Bluetooth control, HD and satellite radio, and even a DVD player. Installing one is a reasonably simple upgrade that even untrained DIYers may be able to complete.
Tools for Installing a Head Unit
You'll need the necessary tools to install a head unit. If you haven't already purchased a head unit, ensure sure it fits the area in your vehicle. To that aim, you should be aware of the distinctions between single DIN, double DIN, and DIN-and-a-half. This will save you from hassles later on.
To repair or install a head unit, you will need the following tools and equipment:
You'll also need solder or crimp connections if you don't have a wire harness adaptor.The tools needed to install a car radio can vary depending on the vehicle. If something doesn't quite fit, a new tool may be required. Attempting to push a square peg into a round hole seldom works.After removing the trim piece screws, use a flat blade screwdriver or prying tool to peel the trim piece off.Other ways are used to keep some units in place. Ford head units, for example, are occasionally locked in place by internal clasps that require a specific tool to disengage.If the trim, faceplate, or dash components would not budge, do not push them off. Examine the region where the component is tied carefully; you will most likely discover a screw, bolt, or other fastener keeping it in place.
Once you have successfully removed all of the fasteners, you should be able to loosen and remove the trim piece. In some cases, you may need to disconnect various switches and wire connectors as well. In doing so, be careful not to yank out the wires.Climate controls are also linked to the head unit in certain automobiles. If you break these connections by tugging too hard, the heating, ventilation, and air conditioning may not function properly when you reassemble the components.With the head unit bolts exposed, it's time to remove the vehicle radio from the dash.Some head units are secured with screws, while others rely on bolts, Torx fasteners, or a unique fastening system. (In the car seen above, the stereo is secured with four screws.) Remove the screws or fasteners, store them somewhere secure, and then carefully lift the head unit off of the dash.Factory vehicle radios are frequently kept in place by intricate brackets, which you may or may not require to install your replacement head unit.In this example, the single-DIN collar is too small to fit directly into a dash. It also doesn't fit inside the existing bracket. That means we won't be using it. Instead, we'll screw the new head unit into the existing bracket. Note that the existing screws may not be the correct size.
Check the Plugs and Wired Connections
It is easiest to install a new head unit that is compatible with the existing wiring harness. However, this limits the number of head units you can use. In the vehicle pictured above, the plug and connector do not match. There are a few different ways to deal with such a situation.The easiest is to buy an adapter harness. If you find a harness that's designed specifically for your head unit and vehicle, you can plug it in and go. Some harnesses can be wired directly into the pigtail that came with your new head unit.The other option is to cut off the harness that was connected to your factory radio and then wire the aftermarket pigtail directly into it. If you choose to go that route, you can use either crimp connectors or solder.
Solder or Crimp the Wires, If No Harness Adapter Is Available
The fastest way to connect an aftermarket pigtail to an OE harness is with crimp connectors. Simply strip two wires, slide them into a connector, and then crimp it.At this stage, it's vital to connect each wire properly. Some head units have wiring diagrams printed on them. Every factory head unit has its own system for speaker wire colors. In some cases, each speaker is represented by a single color, and one of the wires has a black tracer. In other cases, each pair of wires will be different shades of the same color. Aftermarket car radios use a fairly standard set of wire colors.If you are unable to find a wiring diagram, use a test light to identify the ground and power wires. When you locate the power wires, make sure to note which one is always hot.You can also determine the identity of each speaker wire with a 1.5v battery. You will need to touch the positive and negative battery terminals to different combinations of wires.When you hear a slight pop of static from one of the speakers, that means you have found both of the wires that connect to it.
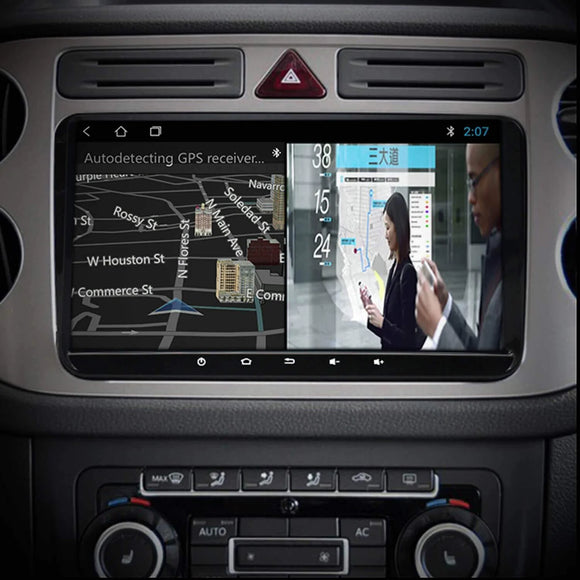
completed stereo head unit installation
After you've finished wiring your new vehicle radio, gently set it in the dash and turn the ignition to the accessory position. Check that the radio is operational. If not, double-check your wiring work.You're almost there after you've determined that your new radio works properly. All of the difficult aspects are behind you, and all that remains is to reverse the removal operation.In most situations, all that is required to complete the procedure is to screw the new head unit into position, press the trim piece back on, and turn on your beautiful new stereo.