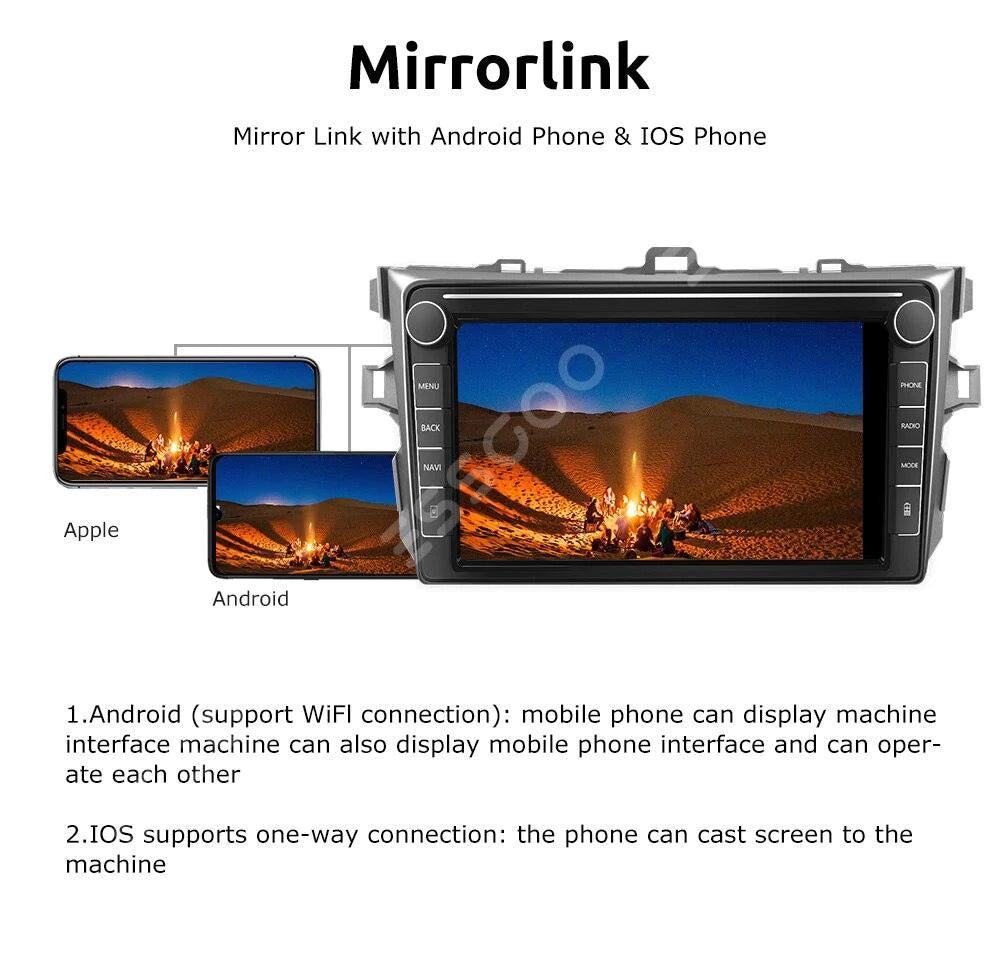
Installing a Car Stereo
Replace your old stereo with a new one.
The fundamentals of car radio installation -We'll guide you through the steps of installing a new vehicle radio in this post. We'll go over:How to Disassemble the Factory Stereo.What you need to know to attach the new receiver correctly.
Installing a New Car Stereo
Please go over these instructions before starting the installation so you know what to anticipate.Gather your tools.You'll need a few tools to complete the task, but nothing major. The most frequent tools are a pair of screwdrivers and a wrench or socket set for the battery wire. You'll also need wire strippers, electrical tape, and a means to connect the wires, which we'll go through later. A panel removal tool is one of the most crucial items you'll need to carefully remove the dash panels without damaging or destroying anything.
Taking off the factory stereo
The first step in installing a new audio in your automobile is to uninstall the old one. It's easy to rush through the removal stages and forget about them. But don't be too hasty! You'll want to remember the order of these procedures since you'll be reversing this technique to install a new stereo.You'll need a pair of DIN tools if the stereo is held in place by spring clips. Insert the DIN tools into the unit's holes on either side until you hear a click. The tools are used to disengage the spring clips and to latch onto the sides of the stereo so that it may be readily removed. Spread the tools apart slightly before removing the stereo from the dash.Din tools were used to remove the OEM stereo.
Taking apart a bolted-down stereo
Accessing the stereo may necessitate the removal of one or more trim panels from the dash. To disassemble other panels, you may need to (carefully) push the plastic trim away from the dash (which is typically held in place by concealed pressure clips), or find and remove bolts. Once you've gotten inside the stock stereo, you should be able to view the screws that hold the radio to the dash. Pull the stereo out of the dash by removing the screws.Installing a radio in the dash of a Prius.
Removing a stereo from a train system
Some automakers install the factory radio to a guide rail inside the dashboard. After removing the spring clips or nuts, you may slide the radio off the rail. This rail may also have to be removed since it might occasionally interfere with the chassis of a new radio. Keep in mind that after this is done, you may not be able to restore the factory radio.
Disconnecting the factory stereo
If your vehicle has (or once had) a factory stereo, or if it was pre-wired with a "stereo prep" package, there should be at least one plastic wiring harness behind the stereo opening. This plug connects the stereo to your vehicle's electrical system and the speakers. You will need to unplug the factory stereo from the wiring harnesses, and unplug the antenna to complete the removal process.
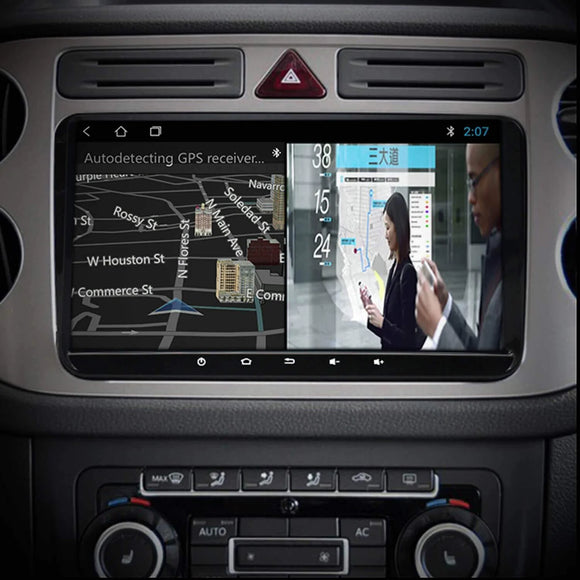
How to wire a car stereo
car stereo custom wiring harness
These harnesses usually include a color-coded wiring diagram for connecting the harness to your new stereo. Your new stereo will also include a radio wiring diagram in the owner's manual. Refer to the two diagrams to confirm the car stereo wire colors that need to be connected to the adapter harness. The nice thing is that you can make these connections on a workbench, desk, or kitchen table without having to be inside the vehicle.
If a harness is not available for your vehicle or if the factory stereo plug was cut off, you'll need to identify each of the car's stereo wires and connect them to the corresponding wires of your new stereo. If you purchased your new stereo from Crutchfield, our Tech Support team may be able to tell you the colors and functions of your car's wiring.
Posi-product connectors
Options for connecting the wires
You’ll need to fasten bare wires together, and there are few ways to do it. Please avoid only taping the wires together — eventually the tape will dry out and fall off, exposing the wires and making it only a matter of time before something shorts out. Here are the options that will give you secure, lasting connections:
Soldering creates a permanent, professional connection that ensures maximum current transfer. We strongly recommend that you use heat-shrink tubing and a heat gun to insulate the soldered connection. Most purists prefer this method, because it’s the most secure and conductive connection for the wiring.
Posi-Product connectors offer a quick and secure twist-on connection for wires, and they can be re-used. It never hurts to have a couple of Posi-Tap connectors on hand for various jobs, too. This is our favorite way to get strong connections fast.Crimping is fast and fairly simple. If you crimp the wires together, be sure to use the correct size crimp connector-typical in-dash stereo wires are 18-gauge, but a few use heavier gauge power and ground wires. There are several types of crimp connectors, including bullet connectors, butt connectors, or crimp caps.
The Crutchfield ReadyHarness service streamlines installation by allowing us to complete the majority of the work for you. Before we dispatch your new stereo, we will professionally connect the harness from your new stereo and your vehicle-specific adaptor harness. When you inform us about your vehicle and choose a new radio, we'll let you know if this service is available for it.View our wire connection videos to see these various approaches in action.